“It’s the little things that kill”–Bush
OK… The band Bush may not be the greatest rock band ever, but their lyric above is indeed remarkable. In forensic science, it is very true that it is the little things that kill.
Three of the most often overlooked and hidden sources of analytical error are the “little things:” (1) Pipetting, (2) use of Volumetric glassware/flasks, and (3) mass measure weights/balances.
(The above video is simply the best single video after scouring the internet that graphically demonstrates error by improper technique of pipettes and improper use of volumetric glassware/flasks).
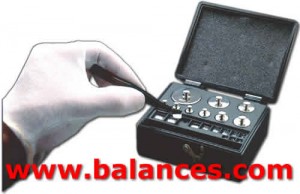
There is also the proper handling of mass measurements and standards. Even the simple deposit of oil by using one’s hands can compromise the validity of the weight itself. Per NIST Handbook 105-1, all surfaces shall be smooth and free of scratches.

The proper method of handling these important volumetric and mass measures used in forensic science is important, but does not constitute the complete picture. It is crucial to note that there are different types of classes of Volumetric glassware/flasks and mass weights. The best and most precise of these are traceable to NIST standards and are traceable to ISO/IEC 17025 laboratories. One cuh example is a designation known as “Type A glassware”.
There are typically three sources of weight classifications used in the United States:
• National Institute of Standards and Technology (NIST) Class F;
• ASTM (originally known as the American Society for Testing and Materials) E 617-97, Classes 0 through 7; and
• International Organization of Legal Metrology or Organisation Internationale de Metrologie Legale (OIML) R111, classes: E1, E2, F1, F2, M1, M2, M3.
According to balances.com which is one provider of mass measures:
OIML E2 and Ulti Mass Class U Mass Standards. These mass standards provide the greatest precision we offer. They are ideal for use as reference standards to calibrate other weights or for calibrating high-resolution analytical balances. Ulti Mass weights are identical to E2 weights except for the nominal value markings. E2 weights have no markings on the weights, many customers prefer the weights be marked with the nominal value. The OIML E2 tolerance is approximately two times the precision of ANSI/ASTM Class 1.
ANSI/ASTM Class 1 can be used as reference standard in calibrating other weights and appropriate for calibrating high-precision analytical balances (from 0.01mg to 0.1mg).
ANSI/ASTM Class 2 Appropriate for calibrating high-precision toploading balances with readabilities ranging from 0.001g to 0.01g.
ANSI/ASTM Class 3 Appropriate for calibrating balances with moderate precision, ranging from 0.01g to 0.1g.
ANSI/ASTM Class 4 Appropriate for student use and semi-analytical weighing.
NIST Class F Used to test commercial weighing devices by state and local weights and measures officials, device installers and service technicians. Class F weights may be used to test most accuracy class III scales, all scales of class III L or IIII, and scales not marked with a class designation.
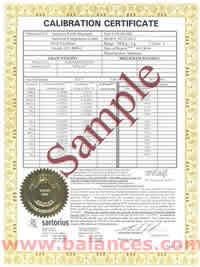
Each mass measure and other standard device such as Pipettes, Volumetric glassware/flasks, and mass measure weights/balances should have a report of traceability. For example in mass measures, these reports should identify:
- Tolerance class
- Type of construction
- NIST test number
- Date of applicable Sartorius primary standard(s)
- Secondary set number
- Includes technician’s signature
- Description of the weight(s)
- Test Number
- Serial Number
- Nominal Value
- Uncertainty of the measurement tolerance
- Information on weighing procedures
- Date the primary standards were last tested at NIST and the NIST test number
- Date and test number for the calibration place’s working standards.
- Statement of compliance to ANSI/NCSL Z540 and ANSI/ISO/IEC 17025
- NVLAP Accreditation Logo and laboratory code.
- Statement of traceability to the International Prototype Kilogram (IPK) this meets the international requirement for traceability to the International System of Units.
In addition, there should be certificates of calibration. One possible way to determine whether not a weight is one that has a ceritificate of calibration is if there is a “C” at the end of the part number. The Certificate of Calibration includes everything found in a Report of Traceability listed above with the additional information listed below:
- Uncertainty value
- Test conditions temperature, barometric pressure, humidity.
- Conventional Mass Correction
- Uncertainty of the measurement
- Identification of the balance used in the calibration
- as found value if an adjustment is performed
- assumed density of the weight
- material weight is made from
- Pass/Fail result of magnetic testing
- Volume of the weight
- Cubical Coefficient of expansion
- True Mass correction
When we look at these “little things” we have to insist upon their precision and the accuracy as they are indeed the foundation of proper measurement. There are many different possible traceable sources of certification and/or traceability back to standards including the National Institute of Standards & Technology (NIST), the American Society for Testing & Materials (ASTM), the International Organization of Legal Metrology (OIML) and ISO 17025. Internationally, there is accreditation by the National Voluntary Laboratory Accreditation Program (NVLAP) and the United Kingdom Accreditation Service (UKAS), formerly known as NAMAS.
What we have to remember is the old laboratory adage: Quantitative analysis is clean analysis.


